Creative Craft
Tutorial - A Needlekeep - My Version
The exchange I will be running on Cross Stitch Friends in the UK for July will be a Needlekeep.
This is my version of how I make mine. Its very simple.
You need :-
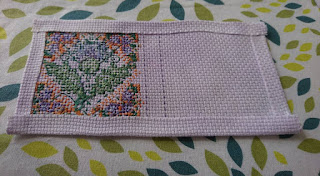
- Your stitched Piece. As you can see I have stitched the design on the right hand side of my fabric and a square the same size on the left. In between I left 6 squares of free fabric. This is where you fold later on.
- Some bondaweb. You can get this really cheaply on Ebay or from a local sewing shop
- Some felt for the inside
- Some ribbon
- An iron and an ironing board.
- Pair of scissors
Trim your stitched piece to about 8 squares all around the rectangular piece. Also cut your bondaweb and felt piece.
Cut the corners diagonally cutting in 4 squares.
Turn so the back of you work is facing you and fold in the outer edges leaving two square visible on the front. Iron Use a little bondaweb to hold down if necessary.
Your piece of work should now look like the above.
Fold your ribbon in half and then place the central fold onto the middle of the rectangle.
Place your bondaweb on top and iron lightly ensuring that it has melted onto your piece.
Peel off the backing paper holding the ribbon in place as you do this.
Place your felt insert on top of the piece and bondaweb.
Iron lightly
Your piece should now look like this
Folding the back over the front ( in other words fold in half) press lightly with a warm iron
Open up and places some needles inside
Fold back up and tie the bow. Voila Needlekeep


No comments